
Identity Provider Section
Within a federation, applications and organizations play one or both of two roles: identity provider and/or service provider. The identity provider is the authoritative entity responsible for authenticating an end user and asserting an identity for that user in a trusted fashion to trusted partners.
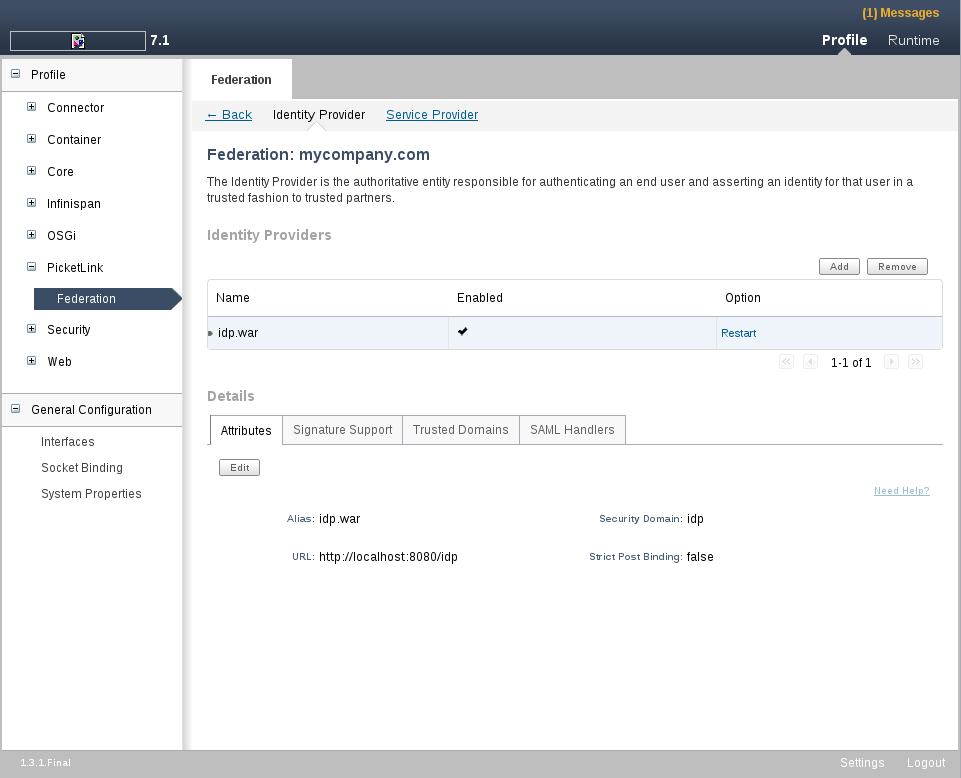
This tab allows the configuration of a deployed application as an Identity Provider. You can add and remove an identity provider clicing on Add or Remove buttons. When adding a new identity provider, you will have to inform the following informations:
-
Is External ?: Use this checkbox to configure the Identity Provider as a Remote Identity Provider. This means you can configure your federation to use a remote IDP instead of a hosted one.
-
Alias: Combo-box with all deployed web applications. Choose one of them to configure as an Identity Provider.
-
Security Domain: Combo-box with all security domains configured in your JBoss Application Server. The security domain will be used to authenticate users.
-
URL: The URL to use to access this Identity Provider. if you do not provider a value will be assumed a value as: *http://localhost:8080/my_app.* Where my_app is the application selected in the Alias field.
When configuring a Identity Provider make sure you deployed the web application you want to play this role. It is recommended that you use the examples provided by PicketLink to correctly configure your identity provider.
Applying changes, forcing a restart of the application
When you update a specific configuration you must restart the application for them to take effect. The Identity Provider's table has a column where you can force a restart. Click on this column and the application will be restarted with the changes you made before.
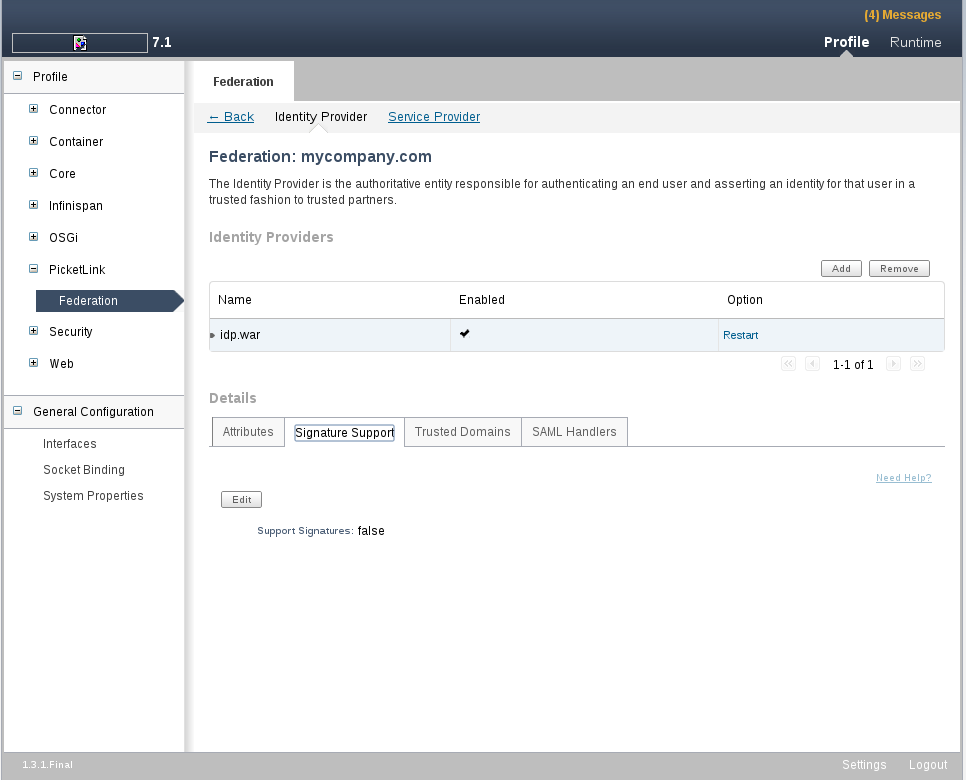
Signature Support Tab
The Signature Support Tab allows to enable signature signing and validation. Basically, what you need is just check the Support Signatures.
Trusted Domains Tab
After configuring the Identity Provider is important to inform which are the trusted domains. Without this configuration the Identity Provider will refuse authentication requests from service providers. To manage the trusted domains click on the Trusted Domains tab.
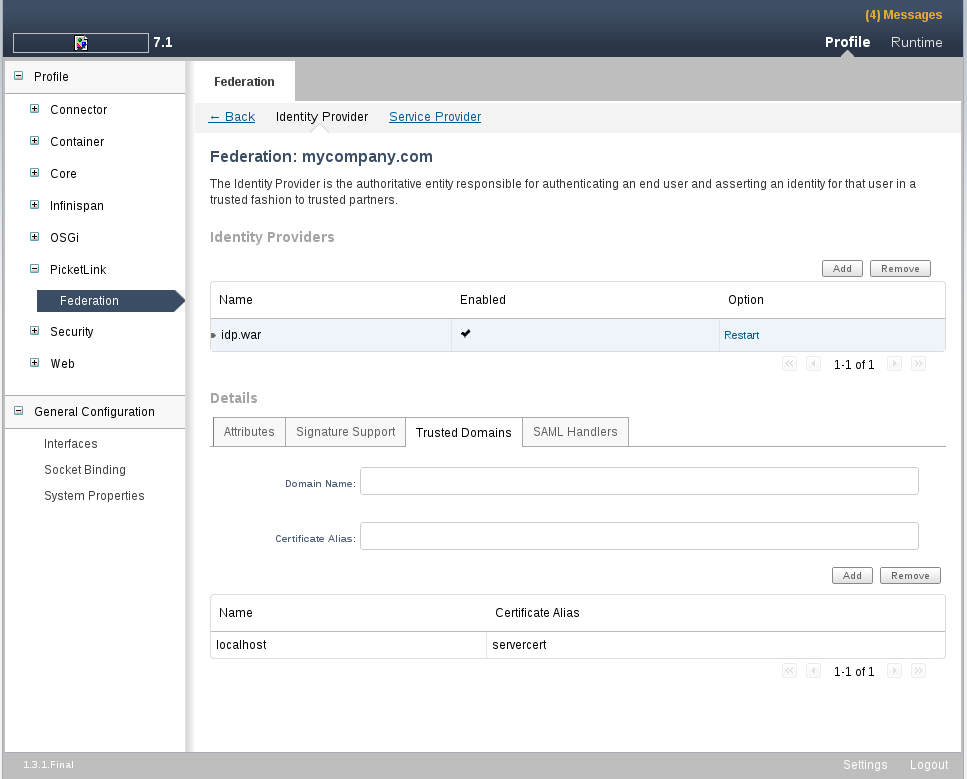
In this tab you can Add and Remove trusted domains.
When adding a new trusted domain, you have to inform the following configurations:
-
Name: Trusted domain name. This information will be used to validate the SAML Assertion Issuer based on the host name used to issue the assertion.
-
Certificate Alias: If your Identity Provider are digitally signing SAML assertions, this field configures the alias used to find the certificate to be used.
SAML Handlers Tab
The SAML Handlers Tab allows the configuration of additional PicketLink SAML Handlers.
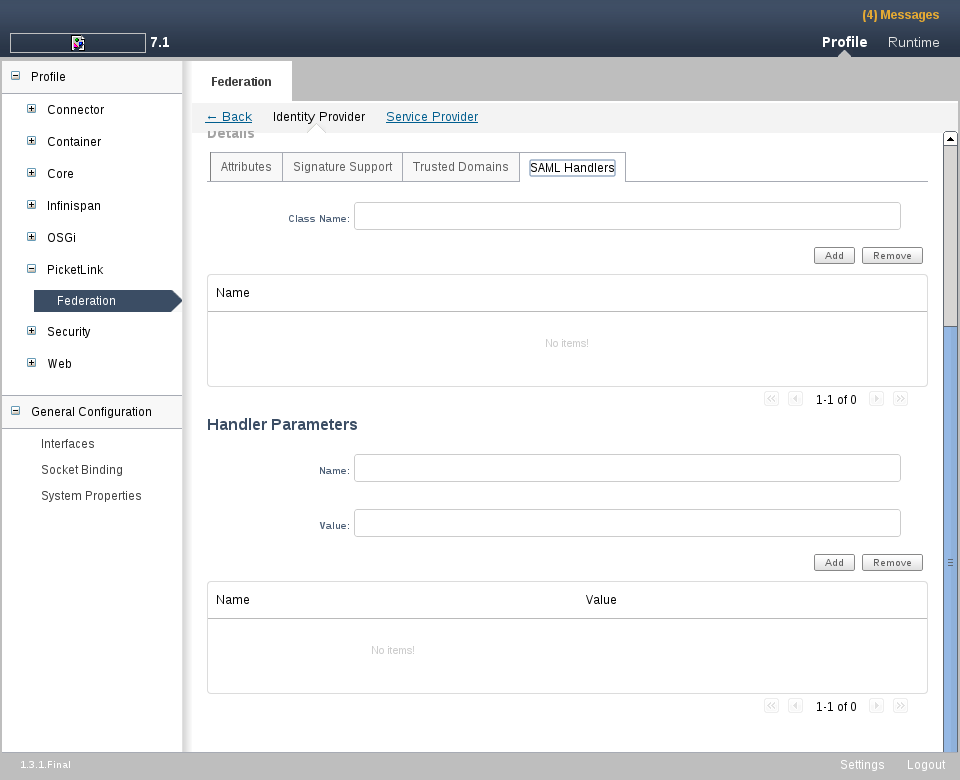
In this tab you can Add and Remove handlers.
When adding a new handler, you have to inform the following configurations:
-
Class Name: SAML Handler class name.
You can also specify the parameters for a specific handler. To do that, select a specific Handler and use the Add button to create a new parameter for it. Parameters must have a name and a value.